Showing posts with label Crafts. Show all posts

Tuesday, October 29, 2013

How to Make your own baby bottomless sandals


How to make

Baby bottomless sandals


About a year ago I posted a blog about the sandals that I had made for a cousin of mine. That blog has had so many views I decided to let everyone in on how to make your very own pair.


The size of your crochet hook will determine the size of your sandals.


Step 1~ chain 8


Step 2~ slip stitch in first single crochet to form the toe loop.


Row 1

Step 3~ chain 2


Step 4~ half double crochet (hdc) two times

(3 hdc in row 1)

Step 5~ chain 2 and turn


Row 2

Step 6 ~ hdc in next hdc

Step 7~ 2 hdc in last hdc

(4 hdc in row 2)

Step 8~ chain 2 and turn


Row 3

Step 9~ hdc in next 2 hdc

Step 10~ 2 hdc in last hdc

(5 hdc in row 3)

Step 11~ chain 2 and turn


Row 4

Step 12~ hdc in next 3 hdc

Step 13~ 2 hdc in last hdc

(6 hdc in row 4)

Step 14~ chain 2 and turn


Row 5

Step 15~ hdc in next hdc

Step 16~ chain 3


Step 17~ skip 1 hdc

Step 18~ slip stitch in next hdc
 

Step 19~ chain 3


Step 20~ skip 1 hdc

Step 21~ hdc in next 2 hdc

Step 22~ Finish off


Sandal straps

Step 1~ chain 30

Step 2~ attach to sandal with single crochet (sc)


Step 3~ 2 sc around each post down to the toe loop (10 sc total)


Step 4~ 10 sc around toe loop


Step 5~ 2 sc around each post to top of sandal


Step 6~ chain 30 and finish off


Flower or embellishment

Step 1~ with complimenting color chain 5

Step 2~ join with slip stitch

Step 3~ chain 5

Step 4~ attach to loop with sc

Step 5 ~ repeat steps 3 & 4, 4 times (5 flower pedals)


Step 6~8 sc around chain in each loop

Step 7~ slip stitch to join first and last stitch

Step 8~ finish off and tuck ends


Step 9~ if you would like sew a button on top of the flower to the sandal


Step 10~ Tie loose ends in the back


Step 11~ Tuck in ends and you are done! Repeat all steps for second sandal


Tuesday, June 4, 2013

Summer time!

I am looking forward to summer in San Antonio!  The heat makes me so happy. I can imagine myself with a notebook pool side writing away every day. 
I suppose I think of summer as being filled with lazy days and long fun filled nights.  This is my favorite time of year for a few reasons.
 
1. The heat
2. People seem to be much happier
3. Longer days  
4. More outdoor flexibility and activities are possible.
5. Swimming
6. Camping and fishing  
7. Vacation Bible School
8. More time with friends
9. Family vacations
10. Most importantly precious time with the family.
 
    My life isn’t going to slow down over the summer because I home school all four of my girls. With home schooling it doesn’t matter if you are actively learning from a book, everything you do ends up becoming a teaching experience or opportunity. That doesn’t just stop because it is June 1st.  We will keep up with the book learning over the summer as well.  As a military family it is important that my girls be prepared for whatever school has to offer them where ever we move. I don’t want them to be behind in any way so we make daily schooling a part of our summer activities.
  We are also in the home stretch for painting for Vacation Bible School (VBS)!  This year I am in charge of painting all the backdrops and decorations and decorating our church for the week of VBS.  While I love to paint and have been told that I am pretty good at it, I don’t see myself as a leader. So this has been a new and helpful experience for me. I am painting an average of 7 hours a week.
 
This is a 10’ x 18’ section of the main mural of the town square.
I have a wonderful group of volunteers helping me.
(This is how I spent my morning.Done painting time to outline)
 
 
The badges I painted a few months ago for Sun West VBS
 
A Cowgirl to be used for the girl’s bathroom
(With #3 for size perspective. {If you don’t know what #3 refers to, read post entitled:The number system located here:
http://sillyeclectic.blogspot.com/2012/05/number-system.html})
  
As a family we have started enjoying summer already.  We were out camping on Memorial Day weekend when San Antonio had flooding rains of 8-14 inches depending on where you were.  We had quite a bit of rain in our tent that weekend!  We braved through the storms and had a long relaxing weekend at the lake.  We have also started enjoying the use of our neighborhood swimming pool.  #1 and #2 are pretty decent at swimming and #’s 3 &4 really need a lot of help. But they do okay with just the floaties.  So, what is my goal this summer? Teach all four of them to swim without help. And if I can’t do that, I at least want to teach them all how to float.
 
Another goal this summer is to really catch the writing bug. I am going to work on my novel and blog, and may even start a new project.  I will still update about health stuff as it comes up of course, but I don’t want my blog to be all about that, because I am the silly eclectic. And blogging about MS every post is neither silly nor eclectic. J
 
So for today that is enough. I hope you will stop by and check out all the silliness that is me over the coming months.
 
Gotta go, the ants are biting me!

Thursday, October 25, 2012

Button Ladybugs

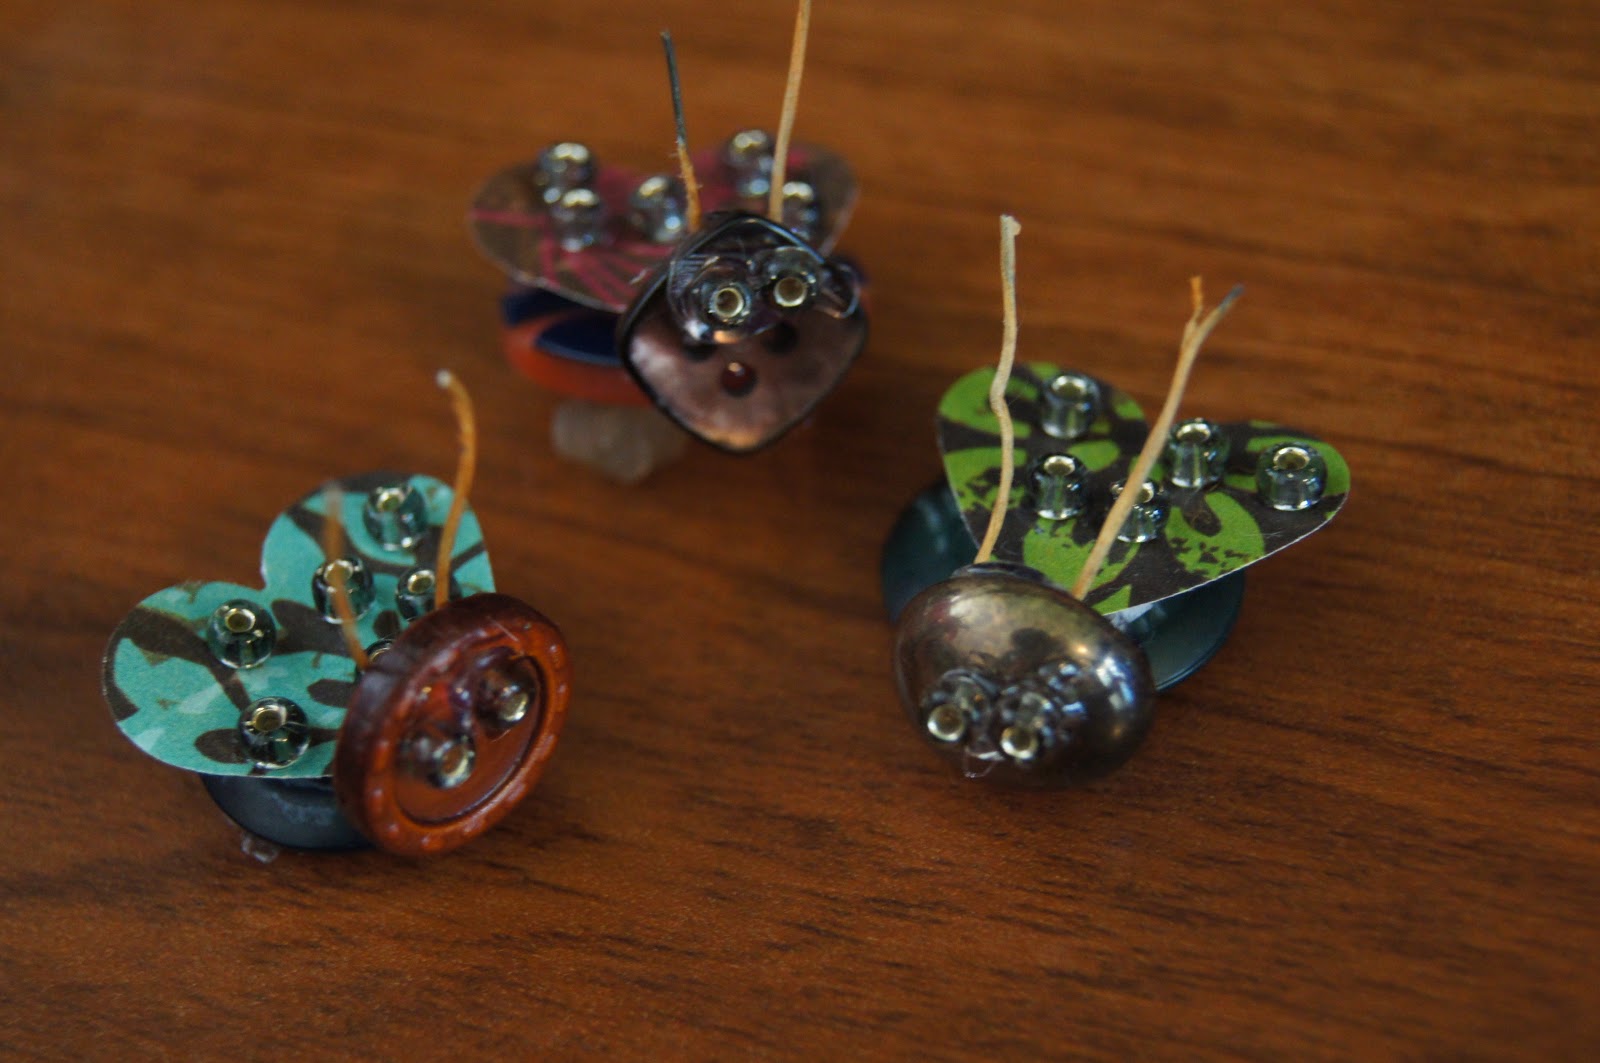
A couple of weeks ago a friend of mine and I threw a baby shower for another friend. This friend really likes lady bugs. I could not find button lady bugs anywhere so I came up with some. And because I like to share and they were so easy to make I will share with you what I came up with.
 
~You will need ~
 pretty paper, (I used several different colors of scrap book papers), 
A heart paper punch, or just cut a heart shape if you don't have a punch.
A large button for the body and a smaller button for the head for each lady bug
Jewelry beads for the spots on the wings and eyes
Hot glue gun and Elmer's glue
3d adhesive foam squares (scrap booking supplies sticky on both sides)
flexible paper wrapped wire

Place 3d adhesive foam square on larger button
Punch/cut heart shape, place 5-6 spots of glue on heart  and place on other side of 3d foam square.
Place a bead on each glue dot.

Hot glue antenna on to back of smaller button.

Put a generous amount of hot glue between button and heart
 hold smaller button firmly in place
 

place a small strip of hot glue on the front of small button
place two beads in hot glue for eyes

Under side of lady bug

Top of lady bug

Finished lady bug

A "flock"? of lady bugs
 
So as you can see this was an easy project and I believe that they turned out pretty cute. The most important thing is to have fun with it! Get creative. I attached the lady bugs to yo yo flowers and ribbons. How to on those to follow soon.


Wednesday, October 10, 2012

Preview of my latest project

I know I have been silent but that doesn't mean I haven't been busy. Here is a preview of my latest project with more pictures and details to come!
 
 
Lady Bugs
YoYo Flower ribbons
 

Lady Bugs!

Hand Stamped and Chalked


Yoyo flower pot with a Volley ballesq lady bug

Wednesday, May 23, 2012

Baby bottomless sandals

A few weeks ago my cousin-in-law posted a picture to my Facebook page and asked. "Can you make these?"  Always up for a challenge I set to work, and this is what I came up with:


I started with cotton yarn and got these cute little washcloth like Baby bottom-less sandal's.  A couple people liked them so I made some more.


 Because I no longer have cute little baby feet in my house to try them on I made three in each color using three different sized crochet hooks. I'm sending all but the last two to my cousin-in-law to "get rid of them" for me.  Maybe she will be kind enough to take pics of these on baby feet for me!

http://pinterest.com/brook_triscuit/